
When a Zanussi machine does not heat water, many users try to immediately replace the heating element. In most cases, this helps, but the malfunction can also be caused by other reasons. Let us figure out which elements of the machine should be checked in order to solve the problem of washing in “icy” water.
Noticing that there is no heating is quite simple. Firstly, condensation accumulates on the hatch door of the machine - this is a clear sign that the glass is washed with cold water. Secondly, things wash worse - stains remain on the fabric after the cycle.
Typically, the automatic machine continues to operate normally, despite the impossibility of heating. Sometimes the washing machine freezes at the beginning of the cycle and displays error code E 61 or E 62. It is better to solve the problem as soon as possible.
The easiest option is to transfer the machine to a service center for diagnostics and repair. But this method entails additional costs. You can try to deal with the breakdown yourself; to do this, you need to identify the range of faults.
The reason that the water does not heat up during washing may be:
It is difficult to understand what exactly happened to the machine just by “symptoms”. Therefore, you will have to carry out a classic diagnosis of the machine. Let us figure out how to perform the check correctly.
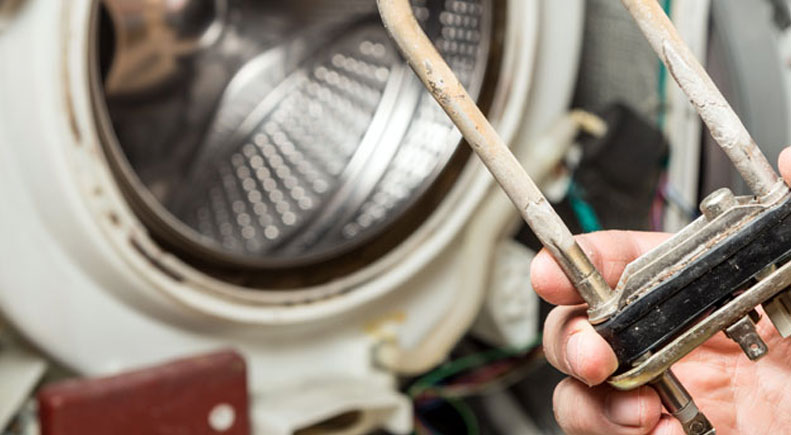
Of course, first you need to inspect the heating element. The element is located on the back of the machine, directly under the tank. The tube heater is easy to access. It is necessary to “halve” the body. For this:
This is how the case is disassembled. In general, you only must unscrew eight bolts.
After disconnecting the back part, you can see the “insides” of the machine. The tank will immediately catch your eye - the heating element is located under it. Take a photograph of the wiring diagram for the heating element and temperature sensor to avoid mistakes when subsequently restoring the circuit.
The further algorithm of actions is as follows:
If the multimeter screen displays a number from 26 to 28 Ohms, then the heating element is working. A one on the display will indicate an internal break, and a zero will indicate a short circuit of the element. If you see “1” or “0” on the display, you will have to change the tubular heater.
If the multimeter shows normal values, you should check the heating element for breakdown. You need to switch the tester to buzzer mode and place the probe against the element terminal. If the device beeps, then you cannot do without replacing the heater.
If it turns out that the reason for the lack of heating is a failed heating element, you will have to replace it. To remove the tubular heater from the “socket,” you must:
It is best to dismantle the heater and go straight to the store with it. The specialist will select a similar heating element suitable for a specific Zanussi model.
Before installing a new part, it is important to clean the seat from accumulated dirt and limescale. It is also better to stick your hand into the “socket” and check if a foreign object is lost between the tank and the drum. Then you can install the heating element and connect the wiring, focusing on the photos taken earlier.
Oddly enough, sometimes the water does not heat up when washing precisely because of the pressure switch. You can find the part under the top cover of the machine, on the right. The water level sensor resembles a washer; a long hose extends from it into the tank.
To check the pressure switch, you must:
This is only the first stage of diagnosis. Next, you need to inspect the level sensor, make sure that there are no cracks, signs of burning or other damage on the “washer” and the pipe. Afterwards, be sure to check whether the hose is clogged.


Copyright © 2020 Coimbatore Service.